VNCサーバ向けのライブラリであるLibVNCServerのサンプルプログラムを動かしてみます。
Table of Contents
1 LibVNCServerとは
VNCサーバ向けのライブラリです。RFBプロトコルをサポートしています。ライセンスはGPLです。
2 LibVNCServerのインストール
apt-get build-depでLibVNCServerのビルド環境を整えます。LibVNCServerのリポジトリからソースコードを取得します。
$ sudo apt-get build-dep -y libvncserver
$ git clone https://github.com/LibVNC/libvncserver
$ cd libvncserver
$ ./autogen.sh --prefix=${HOME}
$ make all install
実行時はLD_LIBRARY_PATH=${HOME}/libを参照すること。.profileでexportしておくと楽かも。
2.1 libvncserver-config
libvncserver-configコマンドでLibVNCServer向けのCFLAGSとLDLIBSを取得します。
$ libvncserver-config --libs
-L/home/hiroom2/lib -lvncserver -lvncclient -lnsl -lpthread -lz
-ljpeg -lresolv -lgcrypt -lgnutls
$ libvncserver-config --cflags
-I/home/hiroom2/include
LibVNCServerを使ったプログラムをビルドするには、以下のようなMakefileを用いれば良いと思います。
SRCS := $(wildcard *.c)
OBJS := $(patsubst %.c,%.o,$(SRCS))
TARGET := $(patsubst %.c,%,$(SRCS))

LIBVNC_CFLAGS := $(shell libvncserver-config --cflags)
LIBVNC_LIBS := $(shell libvncserver-config --libs)

CFLAGS += -g -Wall $(LIBVNC_CFLAGS) $(EXTRA_CFLAGS)
LDLIBS += $(LIBVNC_LIBS)

all: $(TARGET)

clean:
        $(RM) -rf $(TARGET) *.dSYM
3 LibVNCServerのサンプル
exampleディレクトリにサンプルが格納されています。
$ ls libvncserver/examples/*[^coh]
libvncserver/examples/Makefile       libvncserver/examples/pnmshow
libvncserver/examples/Makefile.am    libvncserver/examples/pnmshow24
libvncserver/examples/Makefile.in    libvncserver/examples/regiontest
libvncserver/examples/backchannel    libvncserver/examples/repeater
libvncserver/examples/blooptest      libvncserver/examples/rotate
libvncserver/examples/camera         libvncserver/examples/simple
libvncserver/examples/colourmaptest  libvncserver/examples/simple15
libvncserver/examples/example        libvncserver/examples/storepasswd
libvncserver/examples/filetransfer   libvncserver/examples/vncev
libvncserver/examples/fontsel        libvncserver/examples/zippy
ここではexampleというVNCサーバのサンプルプログラムを動かしてみます。exampleは以下の機能を持ちます。
* RFBプロトコルで通信
* 内部バッファを持つ
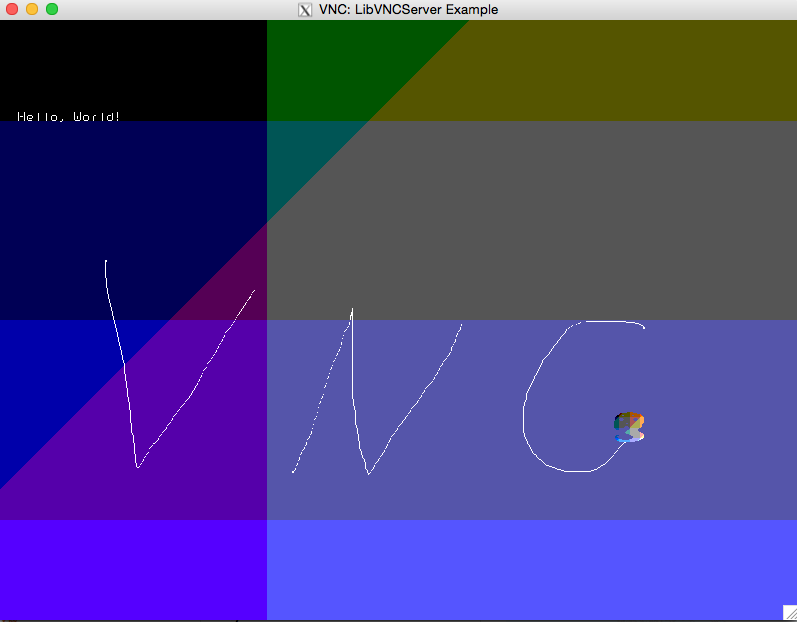
* 初期化時に内部バッファへ色やHello, World!という文字列を描画
* VNCクライアントにバッファの内容を画面イメージとして送信
* VNCクライアントからのマウス操作で内部バッファに線を描画
* VNCクライアントからのキーボード操作で内部バッファに文字列を描画
通常のVNCサーバに比べて以下の機能がありません。
* デスクトップ画面イメージの複写
* デスクトップ画面にマウスとキーボードのイベントを送信
サーバ側でexampleを動かします。
$ ./libvncserver/examples/example
04/06/2015 00:38:08 Listening for VNC connections on TCP port 5900
04/06/2015 00:38:08 Listening for VNC connections on TCP6 port 5900
04/06/2015 00:38:08 Listening for HTTP connections on TCP port 5800
04/06/2015 00:38:08   URL http://ubuntu-14:5800
04/06/2015 00:38:08 Listening for HTTP connections on TCP6 port 5800
04/06/2015 00:38:08   URL http://ubuntu-14:5800
クライアント側のxvnc4viewerでVNCサーバへ接続します。
$ vncviewer localhost

VNC Viewer Free Edition 4.1.1 for X - built Nov 18 2014 16:03:02
Copyright (C) 2002-2005 RealVNC Ltd.
See http://dl-web.realvnc.com for information on VNC.

Thu Jun  4 00:46:50 2015
 CConn:       connected to host localhost port 5900
 CConnection: Server supports RFB protocol version 3.8
 CConnection: Using RFB protocol version 3.8
 TXImage:     Using default colormap and visual, TrueColor, depth 24.
 CConn:       Using pixel format depth 6 (8bpp) rgb222
 CConn:       Using ZRLE encoding
以下のような画面が表示されます。
4 androidvncserver
LibVNCServerにはAndroid向けのandroidvncserverというサンプルがあります。
$ tree ./libvncserver/examples/android/
./libvncserver/examples/android/
├── Makefile
├── Makefile.am
├── Makefile.in
├── README
└── jni
    ├── Android.mk
    └── fbvncserver.c

1 directory, 6 files
/dev/graphics/fb0をmmapしてディスプレイに表示されている内容を取得したり、/dev/inputにキーボードとマウスのイベントを書き込む為、root権限が必要です。
4.1 androidvncserverのビルド
configureでrfbconfig.hを作り直します。
$ cd libvncserver/
$ ./autogen.sh --without-gnutls --without-crypt --without-ipv6 \
--without-client-gcrypt --without-websockets --without-jpeg
APP_ABIでx86 armeabi armeabi-v7aを設定し、各種CPU向けにバイナリを生成するようにします。設定しない場合は、armeabiになります。
$ cd libvncserver/examples/android/
$ echo "APP_ABI := x86 armeabi armeabi-v7a" > jni/Application.mk
ndk-buildでビルドします。
$ ndk-build
[x86] Compile        : androidvncserver <= fbvncserver.c
jni/fbvncserver.c: In function 'print_usage':
jni/fbvncserver.c:462:3: warning: format '%s' expects a matching
'char *' argument [-Wformat=]
   "-h : print this help\n");
   ^
[x86] Compile        : androidvncserver <= main.c
<snip>
[armeabi-v7a] Compile thumb  : androidvncserver <= zywrletemplate.c
[armeabi-v7a] Executable     : androidvncserver
[armeabi-v7a] Install        : androidvncserver => libs/armeabi-v7a/androidvncserver
x86、armeabi、armeabi-v7a向けのバイナリが生成されました。
$ tree libs/
libs/
├── armeabi
│   └── androidvncserver
├── armeabi-v7a
│   └── androidvncserver
└── x86
    └── androidvncserver

3 directories, 3 files
5 android-x86上で実行
androidvncserverをKVM上にインストールしたandroid-x86上で実行します。AVDで作成したx86向けのAndroidの場合と異なり、KVMのネットワークを用いる為、LANで見えるようにIPアドレスを設定できます。
android-x86をVirtualBoxにインストールする手順はこちらを参考にして下さい。
adb connectを使ってLAN経由でandroid-x86に接続します。
$ adb connect [android-x86のIPアドレス]
connected to [android-x86のIPアドレス]:5555
$ adb devices
List of devices attached
[android-x86のIPアドレス]:5555        device  : adb devices
バイナリをandroid-x86に転送します。
$ adb push libs/x86/androidvncserver /sdcard/
5848 KB/s (178292 bytes in 0.029s)
/system/binに配置して実行します。ポートは5901となりました。
$ adb shell
shell@x86:/ $ su -
root@x86:/ # mount | grep system
/dev/block/sda1 /system ext2 rw,relatime,errors=continue 0 0
# cd /system/bin/
root@x86:/system/bin # cp /sdcard/androidvncserver .
root@x86:/system/bin # chmod 755 androidvncserver
root@x86:/system/bin # ./androidvncserver
Initializing framebuffer device /dev/graphics/fb0...
xres=800, yres=600, xresv=800, yresv=600, xoffs=0, yoffs=0, bpp=16
Initializing keyboard device /dev/input/event3 ...
Initializing touch device /dev/input/event1 ...
Initializing VNC server:
        width:  800
        height: 600
        bpp:    16
        port:   5901
Initializing server...
04/06/2015 06:18:26 Listening for VNC connections on TCP port 5901
クライアント側のxvnc4viewerでポート5901を指定してandroidvncserverへ接続します。
$ vncviewer [android-x86のIPアドレス]:5901

VNC Viewer Free Edition 4.1.1 for X - built Nov 18 2014 16:03:02
Copyright (C) 2002-2005 RealVNC Ltd.
See http://dl-web.realvnc.com for information on VNC.

Thu Jun  4 06:25:11 2015
 CConn:       connected to host android-x86 port 5901
 CConnection: Server supports RFB protocol version 3.8
 CConnection: Using RFB protocol version 3.8
 TXImage:     Using default colormap and visual, TrueColor, depth 24.
 CConn:       Using pixel format depth 6 (8bpp) rgb222
 CConn:       Using ZRLE encoding

Thu Jun  4 06:25:54 2015
 CConn:       Throughput 20181 kbit/s - changing to hextile encoding
 CConn:       Throughput 20181 kbit/s - changing to full colour
 CConn:       Using pixel format depth 24 (32bpp) little-endian rgb888
 CConn:       Using hextile encoding
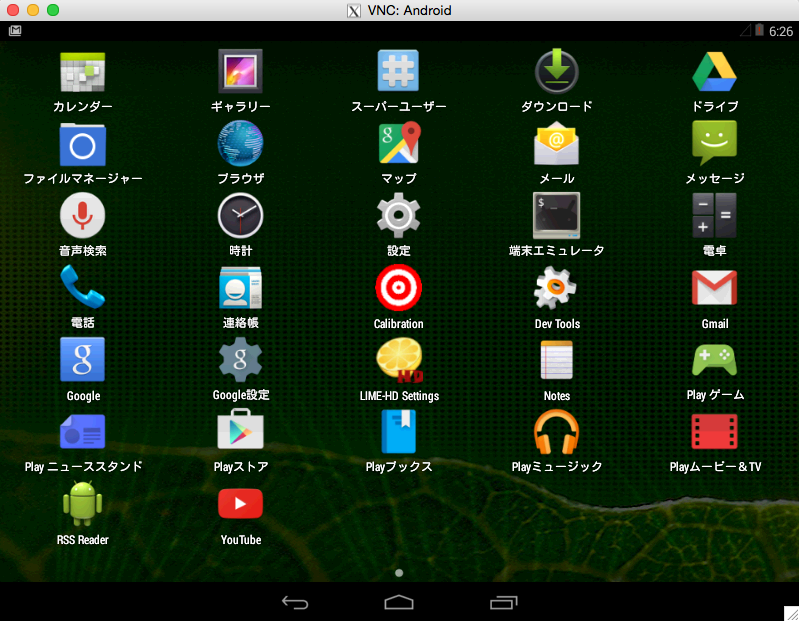
以下のような画面が表示されます。マウスイベントをタッチイベントに送信するところが上手く動作しないようです(仮想マシンの設定のせい?)。