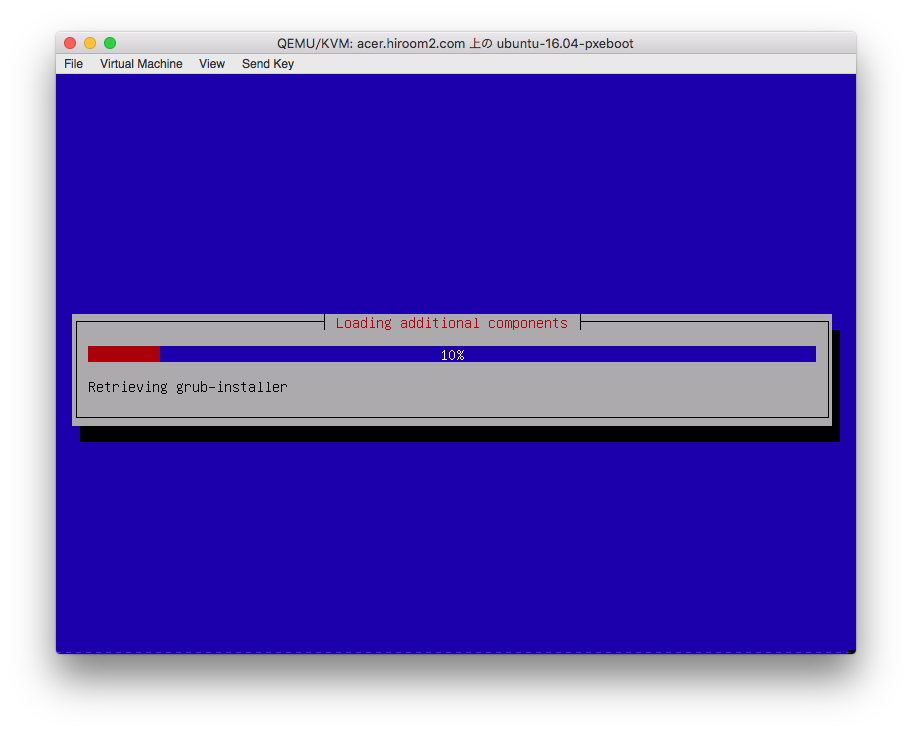
tftpdとdhcpdを用いてPXEブートサーバを立ち上げる手順を記載します。
インストール可能なOSはDebian 8とUbuntu 16.04です。
自動インストールも可能にします。
Table of Contents
1 環境
PXEブートサーバのIPアドレスは192.168.11.66です。
MACアドレス08:00:27:6c:29:8bと52:54:00:01:14:cbのマシンをPXEブートさせます。
2 PXEブートとは
BIOSでBOOTP/TFTPBOOTプロトコルを用いて、ネットワーク越しにOSイメージを読み込む仕組みです。ここでは特にインストールについて焦点を絞っています。
PXEブートは複数台の実マシンにOSをインストールするのに向いています。
ここでは仮想環境を用いていますが、仮想環境をお使いの場合はクローンやストレージファイルのコピーをすれば良いでしょう。
3 tftpdインストールと起動
Ubuntu 16.04ではtftpd-hpaを、Debian 8ではatftpdをインストールします。
Ubuntu 16.04デフォルトでは/var/lib/tftpbootが、Debian 8デフォルトでは/srv/tftpがtftpdのディレクトリとして公開されます。
以降では/var/lib/tftpbootと/srv/tftpを${tftpboot_dir}と表記します。
$ sudo apt-get install -y tftpd-hpa # atftpd on Debian 8
$ sudo systemctl enable tftpd-hpa # atftpd on Debian 8
$ sudo systemctl restart tftpd-hpa # atftpd on Debian 8
4 isc-dhcp-serverのインストールと起動
aptでisc-dhcp-serverをインストールします。
$ sudo apt-get install -y isc-dhcp-server
DHCPサーバからPXEブートで読むファイル名をfilenameで指定します。
hostディレクティブ内でfilenameを使うことで、MACアドレス毎に読むファイルを変更することもできます。
$ sudo su -c 'cat <<EOF > /etc/dhcp/dhcpd.conf
subnet 192.168.11.0 netmask 255.255.255.0 {
  option domain-name "hiroom2.com";
  option domain-name-servers 192.168.11.2, 192.168.11.1;
  option routers 192.168.11.1;
  filename "pxelinux.0";
}

host debian-8-pxeboot {
  hardware ethernet 08:00:27:6c:29:8b;
  fixed-address 192.168.11.129;
}

host ubuntu-16.04-pxeboot {
  hardware ethernet 52:54:00:01:14:cb;
  fixed-address 192.168.11.128;
}
EOF
'
systemctlでisc-dhcp-serverを起動します。
$ sudo systemctl enable isc-dhcp-server
$ sudo systemctl restart isc-dhcp-server
5 ネットブートイメージの取得
Debian 8のネットブートイメージを取得し、${tftpboot_dir}に置きます。
$ wget -q http://ftp.riken.jp/Linux/debian/debian/dists/jessie/main/installer-amd64/current/images/netboot/netboot.tar.gz -O debian-8-netboot.tar.gz
$ mkdir debian-8-netboot
$ tar zxf debian-8-netboot.tar.gz -C debian-8-netboot
$ sudo cp -a debian-8-netboot/debian-installer ${tftpboot_dir}
Ubuntu 16.04のネットブートイメージを取得し、${tftpboot_dir}に置きます。
$ wget -q http://ftp.riken.jp/Linux/ubuntu/dists/xenial/main/installer-amd64/current/images/netboot/netboot.tar.gz -O ubuntu-16.04-netboot.tar.gz
$ mkdir ubuntu-16.04-netboot
$ tar zxf ubuntu-16.04-netboot.tar.gz -C ubuntu-16.04-netboot
$ sudo cp -a ubuntu-16.04-netboot/ubuntu-installer ${tftpboot_dir}
6 pxelinuxの設定
pxelinuxパッケージを利用せずに、ネットブートイメージに梱包されるpxelinuxを用います。
| pxelinux.0 | PXEブート用のバイナリ |
| ldlinux.c32 | pxelinux.0が利用するライブラリ |
| pxelinux.cfg/default | syslinux.cfgへのシンボリックリンク |
| boot-screens/syslinux.cfg | pxelinux.0の設定 |
| boot-screens/menu.cfg | 起動メニューの設定 |
| boot-screens/vesamenu.c32 | VESA描画用バイナリ |
| boot-screens/libcom32.c32 | vesamenu.c32が利用するライブラリ |
| boot-screens/libutil.c32 | vesamenu.c32が利用するライブラリ |
| debian-installer | Debian 8のネットブートイメージ |
| ubuntu-installer | Ubuntu 16.04のネットブートイメージ |
boot-screens/syslinux.cfgとboot-screens/menu.cfgは新規に追加します。
それ以外のものはUbuntu 16.04のものを利用します。
$ sudo cp ubuntu-16.04-netboot/ubuntu-installer/amd64/pxelinux.0 ${tftpboot_dir}/
$ sudo cp ubuntu-16.04-netboot/ubuntu-installer/amd64/boot-screens/ldlinux.c32 ${tftpboot_dir}/
$ sudo mkdir ${tftpboot_dir}/boot-screens
$ sudo cp ubuntu-16.04-netboot/ubuntu-installer/amd64/boot-screens/libcom32.c32 ${tftpboot_dir}/boot-screens
$ sudo cp ubuntu-16.04-netboot/ubuntu-installer/amd64/boot-screens/libutil.c32 ${tftpboot_dir}/boot-screens
$ sudo cp ubuntu-16.04-netboot/ubuntu-installer/amd64/boot-screens/vesamenu.c32 ${tftpboot_dir}/boot-screens
$ sudo mkdir ${tftpboot_dir}/pxelinux.cfg
$ cd ${tftpboot_dir}/pxelinux.cfg
$ sudo ln -s ../boot-screens/syslinux.cfg default
6.1 boot-screens/syslinux.cfg
boot-screens/menu.cfgを読み込みます。キーを押さない場合、10秒後に一番上(Debian 8の自動インストール)が開始します。
$ sudo su -c "cat <<EOF > ${tftpboot_dir}/boot-screens/syslinux.cfg
path boot-screens
include boot-screens/menu.cfg
default boot-screens/vesamenu.c32
prompt 0
timeout 100
EOF
"
6.2 boot-screens/menu.cfg
以下のメニューを表示します。
- Debian 8を自動インストール
- Ubuntu 16.04を自動インストール
- Debian 8をインストール(通常のインストール)
- Ubuntu 16.04をインストール(通常のインストール)
$ sudo su -c "cat <<EOF > ${tftpboot_dir}/boot-screens/menu.cfg
menu hshift 13
menu width 49
menu margin 8
menu tabmsg

menu title Installer boot menu
label auto-debian-8
  menu label ^Debian 8 automated install
        kernel debian-installer/amd64/linux
        append auto=true priority=critical vga=788 initrd=debian-installer/amd64/initrd.gz preseed/url=tftp://192.168.11.66/preseed/debian-8-preseed.cfg
label auto-ubuntu-16.04
        menu label ^Ubuntu 16.04 automated install
        kernel ubuntu-installer/amd64/linux
        append auto=true priority=critical vga=788 initrd=ubuntu-installer/amd64/initrd.gz preseed/url=tftp://192.168.11.66/preseed/ubuntu-16.04-preseed.cfg preseed/interactive=false
menu begin debian-8
        menu title Debian 8
        label mainmenu
                menu label ^Back..
                menu exit
        include debian-installer/amd64/boot-screens/menu.cfg
menu end
menu begin ubuntu-16.04
        menu title Ubuntu 16.04
        label mainmenu
                menu label ^Back..
                menu exit
        include ubuntu-installer/amd64/boot-screens/menu.cfg
menu end
EOF
"
ここでは自動インストールにpreseedという仕組みを用います。
7 preseedの設定
Debian/Ubuntuのインストーラの入力を予め設定ファイルに記載できる仕組みです。
ここでは${tftpboot_dir}/preseedディレクトリに設定ファイルを格納します。
$ sudo mkdir ${tftpboot_dir}/preseed
7.1 Ubuntu 16.04用のpreseed
rootのパスワードはubuntuです。ユーザubuntuを追加し、パスワードをubuntuにします。
unity、ubuntu-desktop、openssh-serverをインストールします。
$ sudo su -c "cat <<EOF > ${tftpboot_dir}/preseed/ubuntu-16.04-preseed.cfg
d-i debian-installer/locale string en_US
d-i debian-installer/language string en
d-i debian-installer/country string JP
d-i keyboard-configuration/xkb-keymap select jp106
d-i passwd/user-fullname string
d-i passwd/username string ubuntu
d-i passwd/root-password password ubuntu
d-i passwd/root-password-again password ubuntu
d-i passwd/user-password password ubuntu
d-i passwd/user-password-again password ubuntu
d-i user-setup/allow-password-weak boolean true
d-i netcfg/choose_interface select auto
d-i netcfg/get_hostname string unassigned-hostname
d-i netcfg/get_domain string unassigned-domain
d-i mirror/country string manual
d-i mirror/http/hostname string http://jp.archive.ubuntu.com
d-i mirror/http/directory string /ubuntu
d-i mirror/http/proxy string
d-i clock-setup/utc boolean true
d-i clock-setup/ntp boolean true
d-i time/zone string Asia/Tokyo
d-i partman/confirm boolean true
d-i partman/choose_partition select finish
d-i partman/confirm_nooverwrite boolean true
d-i partman-auto/disk string /dev/[sv]da
d-i partman-auto/method string lvm
d-i partman-auto/choose_recipe select atomic
d-i partman-lvm/device_remove_lvm boolean true
d-i partman-lvm/confirm boolean true
d-i partman-lvm/confirm_nooverwrite boolean true
d-i partman-auto-lvm/guided_size string max
d-i partman-partitioning/confirm_write_new_label boolean true
d-i grub-installer/grub2_instead_of_grub_legacy boolean true
d-i grub-installer/only_debian boolean true
d-i grub-installer/bootdev string /dev/[sv]da
d-i pkgsel/update-policy select none
d-i pkgsel/include string unity ubuntu-desktop openssh-server
d-i finish-install/reboot_in_progress note
EOF
"
7.2 Debian 8用のpreseed
rootのパスワードはdebianです。ユーザdebianを追加し、パスワードをdebianにします。
gnome、openssh-serverをインストールします。
$ sudo su -c "cat <<EOF > ${tftpboot_dir}/preseed/debian-8-preseed.cfg
d-i debian-installer/locale string en_US
d-i debian-installer/language string en
d-i debian-installer/country string JP
d-i keyboard-configuration/xkb-keymap select jp106
d-i passwd/user-fullname string
d-i passwd/username string debian
d-i passwd/root-password password debian
d-i passwd/root-password-again password debian
d-i passwd/user-password password debian
d-i passwd/user-password-again password debian
d-i user-setup/allow-password-weak boolean true
d-i netcfg/choose_interface select auto
d-i netcfg/get_hostname string unassigned-hostname
d-i netcfg/get_domain string unassigned-domain
d-i mirror/country string manual
d-i mirror/http/hostname string ftp.jp.debian.org
d-i mirror/http/directory string /debian
d-i mirror/http/proxy string
d-i clock-setup/utc boolean true
d-i clock-setup/ntp boolean true
d-i time/zone string Asia/Tokyo
d-i partman/confirm boolean true
d-i partman/choose_partition select finish
d-i partman/confirm_nooverwrite boolean true
d-i partman-auto/disk string /dev/[sv]da
d-i partman-auto/method string lvm
d-i partman-auto/choose_recipe select atomic
d-i partman-lvm/device_remove_lvm boolean true
d-i partman-lvm/confirm boolean true
d-i partman-lvm/confirm_nooverwrite boolean true
d-i partman-auto-lvm/guided_size string max
d-i partman-partitioning/confirm_write_new_label boolean true
d-i grub-installer/grub2_instead_of_grub_legacy boolean true
d-i grub-installer/only_debian boolean true
d-i grub-installer/bootdev string /dev/[sv]da
d-i pkgsel/update-policy select none
d-i pkgsel/include string gnome openssh-server
d-i finish-install/reboot_in_progress note
EOF
"
8 起動
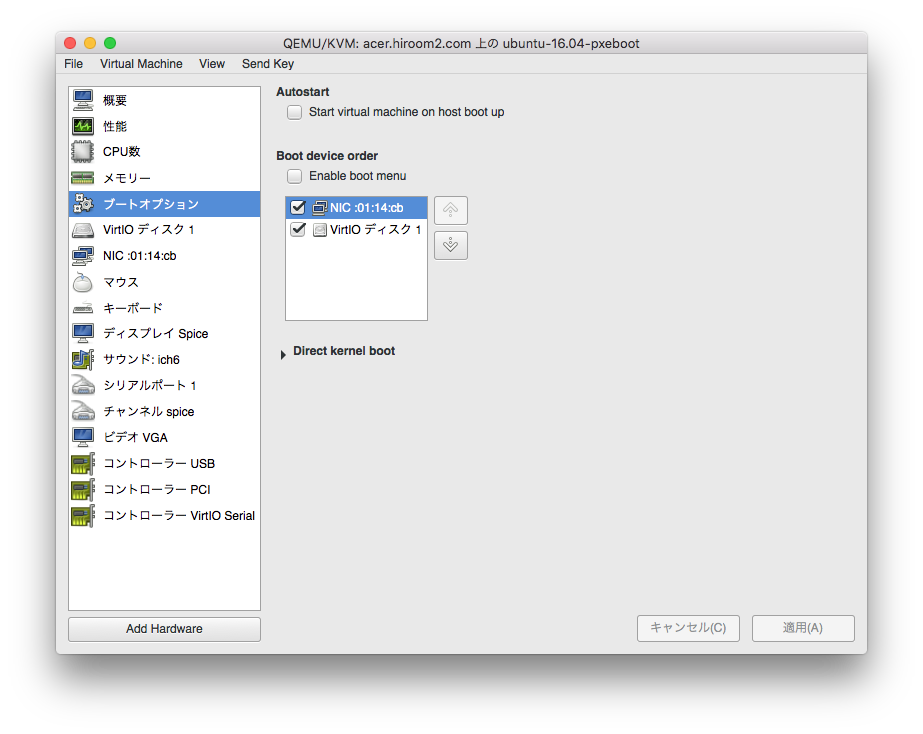
virt-managerの場合、Boot device orderでNICが有効なことを確認します。
ディスクが空の場合はNICの順序はディスクの下でも構いません。
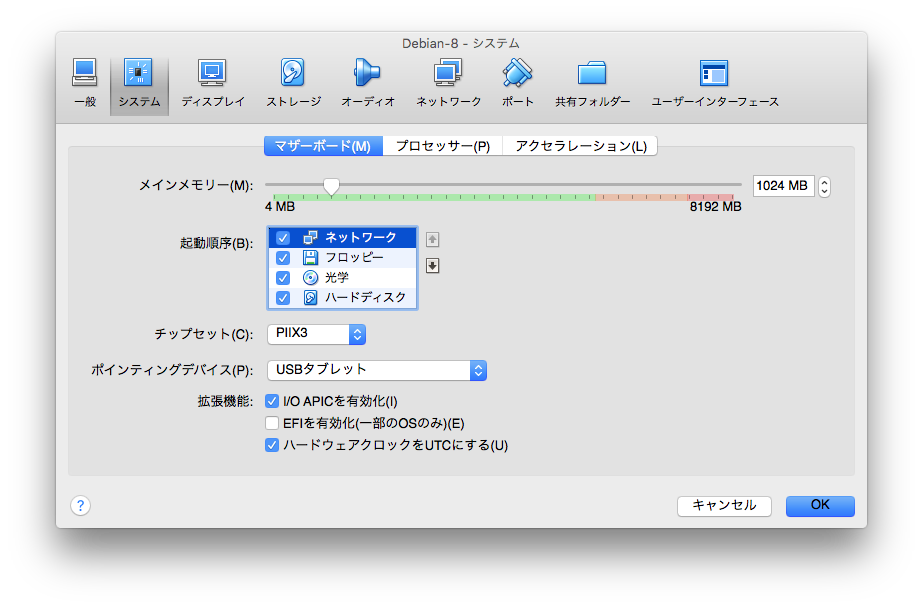
VirtualBoxの場合、起動順序でネットワークが有効なことを確認します。
ハードディスクや光学が空の場合は順序が下でも構いません。
実マシンの場合はBIOSの設定でPXEブートの項目を確認して下さい。
起動するとDHCPからアドレスを分配された後、PXEブートが開始します。
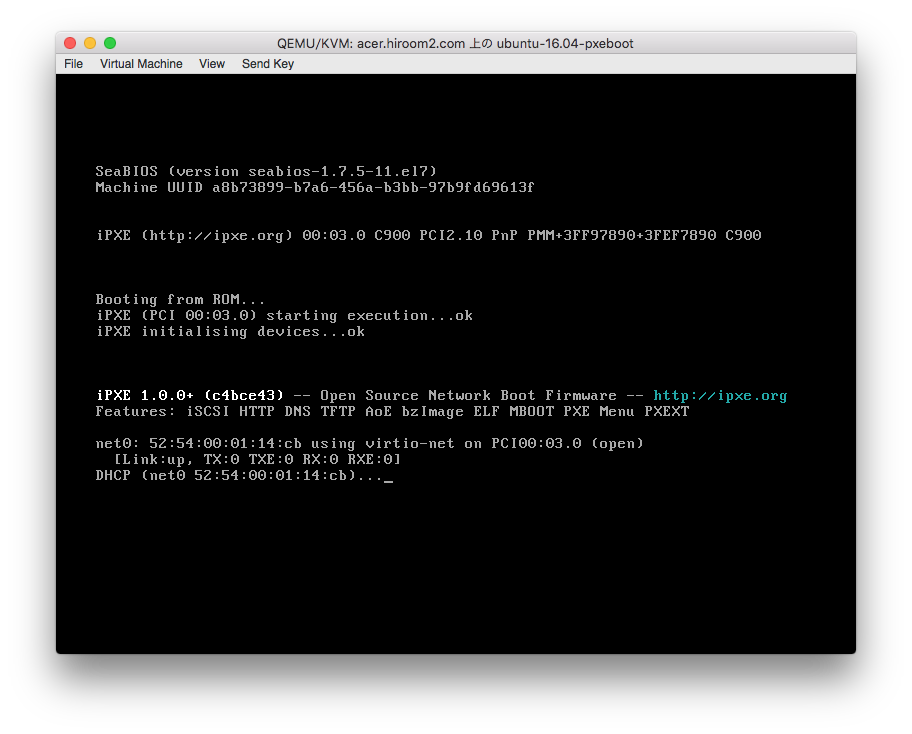
先ほど作成したmenu.cfgによるメニューが表示されます。
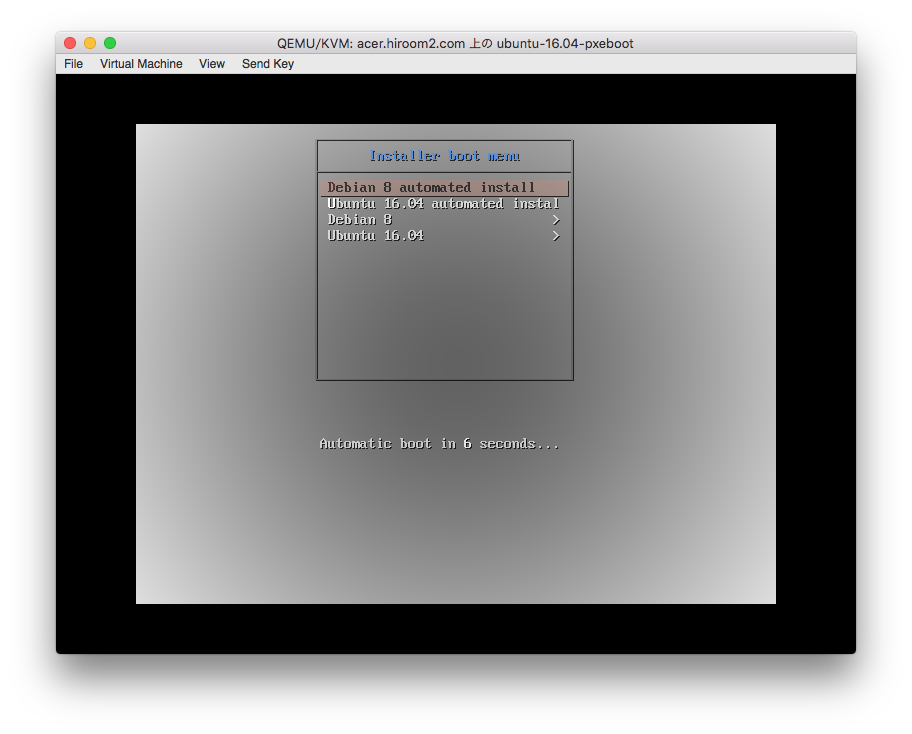
キーを押さない場合、Debian 8の自動インストールが始まります。