This article will describe creating LiveDVD with livecd-rootfs, squashfs and grub-mkresucue for resucue Ubuntu 16.04.
Table of Contents
1 Install packages for creating LiveDVD
Install below packages.
| livecd-rootfs | live-build config files for Ubuntu |
| systemd-container | container environment which can use systemctl |
| xorriso | iso creation tool for grub-mkrescue |
$ sudo apt install -y livecd-rootfs systemd-container xorriso
2 Create rootfs
Copy live-build config files from livecd-rootfs to work directory. This article uses ubuntu-core which has no desktop environment.
$ mkdir live-build
$ cd live-build/
$ cp -a /usr/share/livecd-rootfs/live-build/auto .
$ cp -a /usr/share/livecd-rootfs/live-build/ubuntu-core .
Create config files by lb config with setting PROJECT variable. Change LB_DISTRIBUTION from precise to xenial with sed.
$ PROJECT=ubuntu-core lb config
$ sed -i 's/precise/xenial/g' config/bootstrap
Create chroot directory which will be extracted rootfs.
$ mkdir chroot
$ sudo lb build
A size of ubuntu-core's rootfs is 245MB.
$ sudo du -sh chroot
245M    chroot
3 Customize rootfs
Customize rootfs with chroot and systemd-nspawn.
3.1 sources.list
Copy souces.list from host machine to rootfs.
$ sudo cp /etc/apt/sources.list chroot/etc/apt/
3.2 hostname
Set hostname and add to /etc/hosts which will be used by sudo.
$ echo "ubuntu-live" | sudo tee chroot/etc/hostname
$ echo "127.0.0.1 ubuntu-live" | sudo tee chroot/etc/hosts
3.3 root passwd
Set root passwd with chroot.
$ sudo chroot chroot
# passwd
Enter new UNIX password:
Retype new UNIX password:
passwd: password updated successfully
# exit
3.4 systemd-nspawn
Start container with systemd-nspawn.
$ sudo systemd-nspawn -b -D chroot
<snip>
[  OK  ] Started Update UTMP about System Runlevel Changes.

Ubuntu 16.04 LTS localhost.localdomain console

localhost login: root
Password:
Welcome to Ubuntu 16.04 LTS (GNU/Linux 4.4.0-22-generic x86_64)

 * Documentation:  https://help.ubuntu.com/

The programs included with the Ubuntu system are free software;
the exact distribution terms for each program are described in the
individual files in /usr/share/doc/*/copyright.

Ubuntu comes with ABSOLUTELY NO WARRANTY, to the extent permitted by
applicable law.

root@ubuntu-live:~#
3.5 Install packages for running LiveDVD
Update package list.
# apt update -y
Installing live-boot package and live-boot-initramfs-tools package, and setting "boot=live" to kernel parameter, LiveDVD can be run. "boot=casper" is for installer which can eject DVD when shutdown.
# apt install -y live-boot live-boot-initramfs-tools
Install GRUB2 and linux kernel. This is for using grub-mkconfig and loading kernel.
# apt install -y grub2-common
# apt install -y linux-image-$(uname -r)
Install kbd package for non-English keyboard. This article uses Japanese keyboard.
# apt install -y kbd
# sed -i 's/exit 0/loadkeys jp/g' /etc/rc.local
# echo "exit 0" >> /etc/rc.local
3.6 Install packages for LiveDVD use
This article uses LiveDVD for rescue Ubuntu, e.g. fsck and lvm backup.
# apt install -y network-manager openssh-server openssh-client \
byobu emacs less lvm2 e2fsprogs net-tools
When running ssh server on host, openssh-server's postinst will be failed, but it does not need to take care of it.
Errors were encountered while processing:
 openssh-server
E: Sub-process /usr/bin/dpkg returned an error code (1)
systemd-nspawn can use systemctl.
$ sudo systemctl enable ssh
3.7 Add user
After creating user, run hash command for PATH searching.
# useradd -m -s /bin/bash hiroom2
# gpasswd -a hiroom2 sudo
Adding user hiroom2 to group sudo
# passwd hiroom2
Enter new UNIX password:
Retype new UNIX password:
passwd: password updated successfully
# su - hiroom2
$ hash -r && hash
$ exit
This article sets .ssh and .byobu.
3.8 grub.cfg
Create grub.cfg which can use serial console. And add "boot=live" to kernel parameter. This will run scripts/live in initrd.
# cat <<EOF | tee /boot/grub/grub.cfg
set timeout=1

serial --speed=115200 --unit=0 --word=8 --parity=no --stop=1
terminal_input console serial
terminal_output console serial

menuentry 'ubuntu-live' {
  linux /boot/vmlinuz-4.4.0-22-generic boot=live console=tty1 console=ttyS0,115200
  initrd /boot/initrd.img-4.4.0-22-generic
}
EOF
Shtudown container and return to host.
# poweroff
4 Create LiveDVD
Create squashfs and GRUB installed iso.
4.1 Create directory for iso
Create directory for iso.
$ mkdir iso
$ mkdir iso/live
Copy boot directory to iso. GRUB will load kernel and initrd from this directory.
$ sudo cp -a chroot/boot iso/
4.2 Create squashfs
Create squashfs from chroot directory and copy to iso directory. If you have already created filesystem.squashfs, you must remove previous filesystem.squashfs before creation. If you do not remove previous filesystem.squashfs, there will be duplicated directories like /etc and /etc_1, or /var and /var_1.
$ sudo mksquashfs chroot iso/live/filesystem.squashfs
4.3 Create iso
Create iso which is installed GRUB2.
$ sudo grub-mkrescue -o ubuntu-live.iso iso
LiveDVD will start with running this iso on BIOS.
5 Execution result
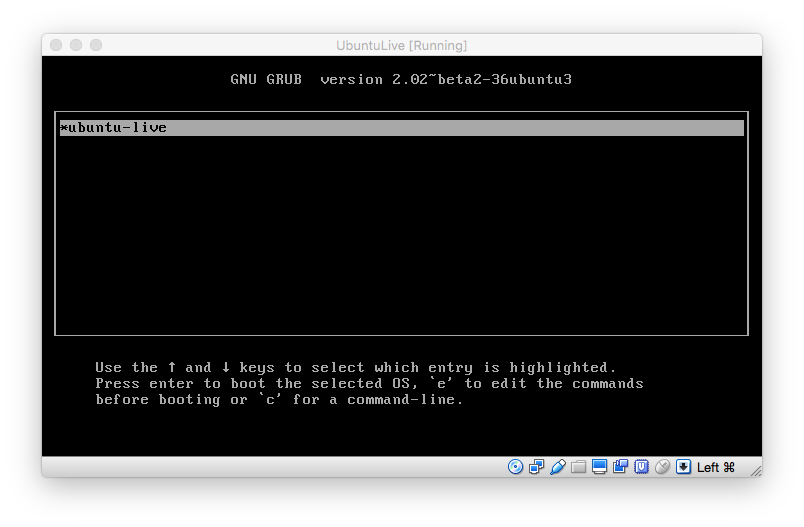
Running iso on VirtualBox is as below.

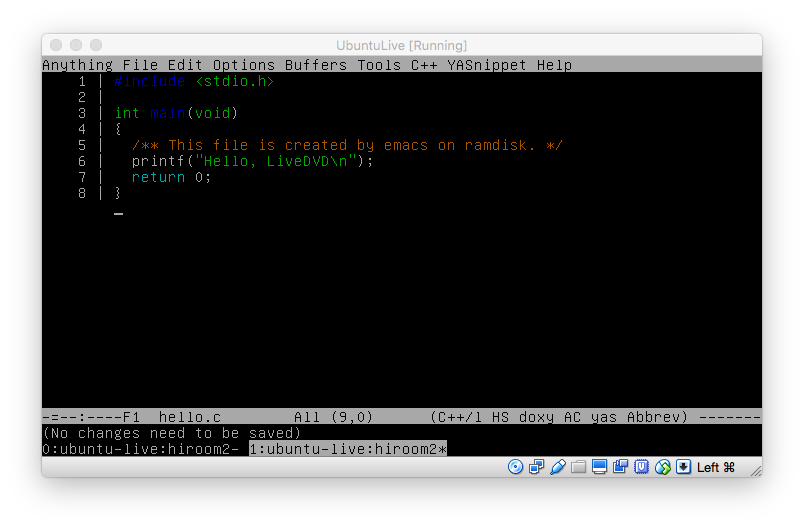
Running byobu and emacs is as below. You can write files to rootfs which is overlayed to ramdisk.

An overlayfs is used at mount point /.
$ cat /etc/fstab
# UNCONFIGURED FSTAB FOR BASE SYSTEM
overlay / overlay rw 0 0
tmpfs /tmp tmpfs nosuid,nodev 0 0
512MB is available for writing files.
$ df -h
Filesystem      Size  Used Avail Use% Mounted on
udev            490M     0  490M   0% /dev
tmpfs           100M  3.4M   96M   4% /run
/dev/sr0        737M  737M     0 100% /lib/live/mount/medium
/dev/loop0      708M  708M     0 100% /lib/live/mount/rootfs/filesystem.squashfs
tmpfs           497M     0  497M   0% /lib/live/mount/overlay
overlay         497M  380K  496M   1% /
tmpfs           497M     0  497M   0% /dev/shm
tmpfs           5.0M     0  5.0M   0% /run/lock
tmpfs           497M     0  497M   0% /sys/fs/cgroup
tmpfs           497M     0  497M   0% /tmp
tmpfs           100M     0  100M   0% /run/user/1000