This article will describe installing XRDP and connecting XRDP server from Windows 10.
Table of Contents
1 Install XRDP
Install XRDP and TigerVNC server.
$ sudo apt install -y xrdp tigervnc-standalone-server
Because desktop environment cannot be connected if session type is not Xvnc, change default session type from Xorg to Xvnc.
$ cd /etc/xrdp/
$ cat <<EOF | sudo patch -p1
--- a/xrdp.ini     2017-06-19 14:05:53.290490260 +0900
+++ b/xrdp.ini  2017-06-19 14:11:17.788557402 +0900
@@ -147,15 +147,6 @@ tcutils=true
 ; Session types
 ;

-[Xorg]
-name=Xorg
-lib=libxup.so
-username=ask
-password=ask
-ip=127.0.0.1
-port=-1
-code=20
-
 [Xvnc]
 name=Xvnc
 lib=libvnc.so
@@ -166,6 +157,15 @@ port=-1
 #xserverbpp=24
 #delay_ms=2000

+[Xorg]
+name=Xorg
+lib=libxup.so
+username=ask
+password=ask
+ip=127.0.0.1
+port=-1
+code=20
+
 [console]
 name=console
 lib=libvnc.so
Restart XRDP.
$ sudo systemctl restart xrdp
2 Connect XRDP from Windows 10
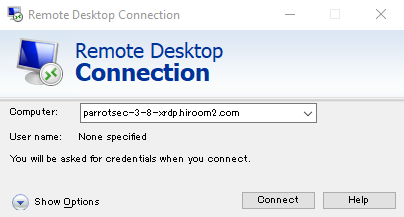
Run remote desktop.
Windows start button -> Windows Accesssories -> Remote Desktop Connection
Input FQDN or IP address of XRDP server and connect to XRDP.

Input username and password.

Desktop environment is displayed.
